
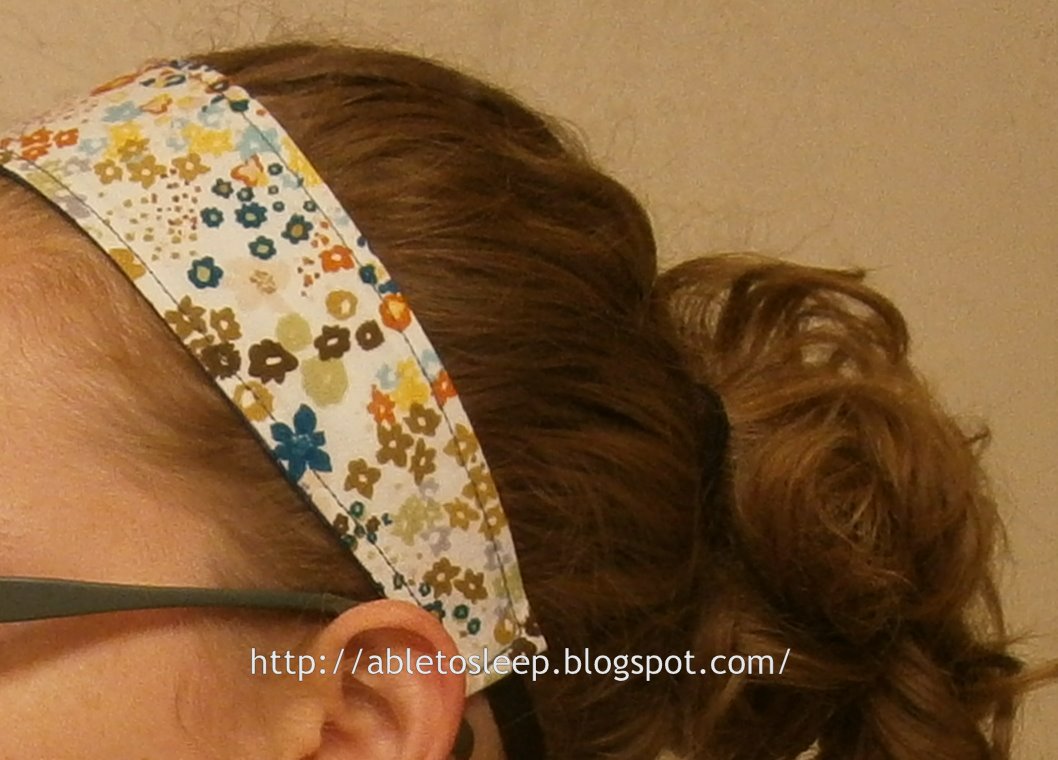
It is very difficult for me to find headbands that stay on my head, hold my hair, and don't give me headaches. I am so demanding! This headband works perfectly. Here is a tutorial for you to make your own.
Supplies
- Two small pieces of coordinating fabric (about 3"x16" each)
- Fusible interfacing
- About 8-10" of elastic (I prefer 3/8" width)
- Thread
Directions
1. Print this pattern
2. Fold the fabric in half, pin the pattern in place, and cut out. Repeat for the coordinating fabric and two times on the fusible interfacing
1. Print this pattern
2. Fold the fabric in half, pin the pattern in place, and cut out. Repeat for the coordinating fabric and two times on the fusible interfacing

3. Be sure to notch the cut out pieces on the place indicated on the pattern

4. Attach the fusible interfacing (mine is in pieces because I was using up scraps...)

5. Place your fabric pieces right sides together and sew from the notch on one end, following the curve of the fabric, until you reach the notch on the other end. Remember to back stitch at the beginning and the end. The pattern allows for a 1/2" seam allowance. Repeat on the other side of the headband.


6. Trim the excess fabric in between the notches.
7. Carefully flip the headband right side out. It is a tight squeeze, but it gets easier once you get it started. Iron.
8. At the ends of the headband, where the two sides did not get sewn together, fold in the sides. Iron.

9. Fold over the ends of the fabric and tuck in. Iron.


9. Insert the elastic into the space between the two sides. Pin in place. Carefully try on the headband to test if the elastic is the proper length. (Try not to stick your ears with the pins in the process.) Adjust the length of the elastic, as needed.

10. Top stitch around the entire head band. At the ends where the elastic is placed, stitch back and forth for extra strength.

And you are done! Wear and love.
Very cute - I have a bunch of scrap fabric that would be perfect for these! I will be linking back to this post!
ReplyDeleteAnn @ Suburban Prairie Homemaker
Many thanks!
DeleteMy version of your headband goes live tomorrow - I hope you'll stop by and check it out!
DeleteAnn @ Suburban Prairie Homemaker
http://www.suburbanprairiehomemaker.com
Awesome! I look forward to seeing it...
DeleteThanks for stopping by and for your wonderful comments! I love this project - it's a great way to use up stash, it's quick and easy, and it looks fantastic! I'm hoping to make a bunch more to send with my Little Dresses to Haiti, so the young ladies down there can have something nice to go with their new dresses.
DeleteAnn @ Suburban Prairie Homemaker
http://www.suburbanprairiehomemaker.com
Is it necessary to use fusible interfacing? Or would this headband work fine without it? Thank you!
ReplyDeleteIt should be fine without it although it may lose its shape a bit easier.
DeleteI tried to download the pattern but it says it's no longer available.
ReplyDeleteI tried too and it's not there.
DeleteYour pattern is still unavailable.
ReplyDeleteI have found so many interesting thing in your blog and I really love that. Vero Beach Tutoring Keep up the good work!
ReplyDeleteI’ve desired to post about something similar to this on one of my blogs and this has given me an idea. Bethesda Tutoring Cool Mat.
ReplyDeleteI’ve desired to post about something similar to this on one of my blogs and this has given me an idea. Special needs Tutor Alpine Cool Mat.
ReplyDeleteIf I may ask, what fabric did you use?
ReplyDeleteI absolutely love the print